Search This Blog

Monday, April 6, 2015

Cleaning Up My Cleaning Routine

For years, I've tried to use the "greenest" cleaning products available, staying away from nasty chemicals.  I've found that if something makes the skin peel off my hands, it's probably not something we should be using around the house.

About 13 years ago, I became a big fan of Method cleaning products.  At the time, they were one of the few "green" cleaning products on the market, and they had such nifty packaging and marketing that drew me to become a huge advocate of their products.  I've also always been a fan of Seventh Generation products for years, since they're based out of Burlington, VT, my home town!

Fast forward to 2015, when I became a bit skeptical of Method's "green" claims.  On Sunday, while everyone was having their Easter fun, I spent several hours, knee deep in the Environmental Working Group's Cleaners database.  My quest was to to find the best-rated products I could for each task in our home.

Good news - several of the Seventh Generation products I use were all rated as an A or B by EWG.  Bad news - all but one product from Method rated lower than a B.  This sadly proved that I've been greenwashed for years by Method!  So disappointing!  But thank goodness for references like EWG to become more informed.

Now, I know that the best cleaning products are those you make yourself, and I do still make some of my own cleaners that I use for my own purposes around the house.  However, our cleaning people get confused by such non-labeled, multi-use products, that it becomes a chore in itself to try to explain what's what and that the spray bottle of vinegar is for cleaning!  Several of the items I researched are also things I would not even know how to make (nor have time), such as laundry detergent or dishwasher detergent.

If you're on a similar quest to find the healthiest cleaning products for your home, I've compiled a list of the best-rated products readily available online, and where I purchased them for the cheapest price.  I compared Drugstore.com, VitaCost.com and Soap.com.  In general, Soap.com's prices were double that of Drugstore.com and VitaCost.com, so I stopped looking at their site after the first few products!  In some cases, the prices between VitaCost and Drugstore were close, but a limited-time promo on one site or the other made one site a better deal today over the other.


All Purpose Cleaner
  • Sun & Earth All Purpose Cleaner, Light Citrus (only available at VitaCost)
Bathroom
  • Seventh Generation Toilet Bowl Cleaner - Emerald Cypress and Fir (Check between Drugstore.com and VitaCost, depending on promos)
  • Seventh Generation Natural Tub & Tile Cleaner - Emerald Cypress and Fir (Check between Drugstore.com and VitaCost, depending on promos)
Dishes
  • Seventh Generation Automatic Dishwasher Detergent Concentrated Pacs (45 count package) - Free & Clear (Drugstore.com only has the larger size package)
  • Sun & Earth Hypoallergenic Dishwashing Liquid - Light Citrus Scent (only available at VitaCost)
  • Ecover Natural Rinse Aid for Dishwashers (VitaCost)
Glass Cleaner (a nice-to-have when I don't have time to make myself)
  • Sun & Earth Glass Cleaner (only available at VitaCost)
Laundry
  • Biokleen Chlorine Free Oxygen Bleach Plus Powder (Check between Drugstore.com and VitaCost, depending on promos)
  • Ecover Non-Chlorine Bleach Ultra (VitaCost)
  • Ecover Stain Remover (VitaCost)
  • Biokleen Laundry Liquid (Check between Drugstore.com and VitaCost, depending on promos)
  • Seventh Generation Natural Fabric Softener Sheets - Blue Eucalyptus and Lavender (Check between Drugstore.com and VitaCost, depending on promos)
  • Ecover Natural Fabric Softener - Morning Fresh (this was the only liquid fabric softener I could find with a rating of B - all other scents are Cs or lower. This specific scent is only available at VitaCost)
Wood Cleaner
  • Method Wood for Good Daily Clean Almond (VitaCost)
Things I make myself

I hope this list is helpful to you!  I know I'm going to keep it handy for my next reorder of products in a few months.  Here's to safe cleaning!

Sunday, January 11, 2015

Successful Gluten-Free Bread!

A sad realization that I haven't posted on my blog in over a year.  I had no idea it had been that long!  Now that I've gotten over the shock of what I've been doing with my life over the last year, I wanted to post a review and version of a recipe for some gluten-free bread I just made that came out as well as regular bread!  I've been gluten-free for almost five years now, and making a loaf of bread seemed like a gamble, since I've heard (and tasted) so many GF bread horror stories!  This success story was a happy surprise for me!

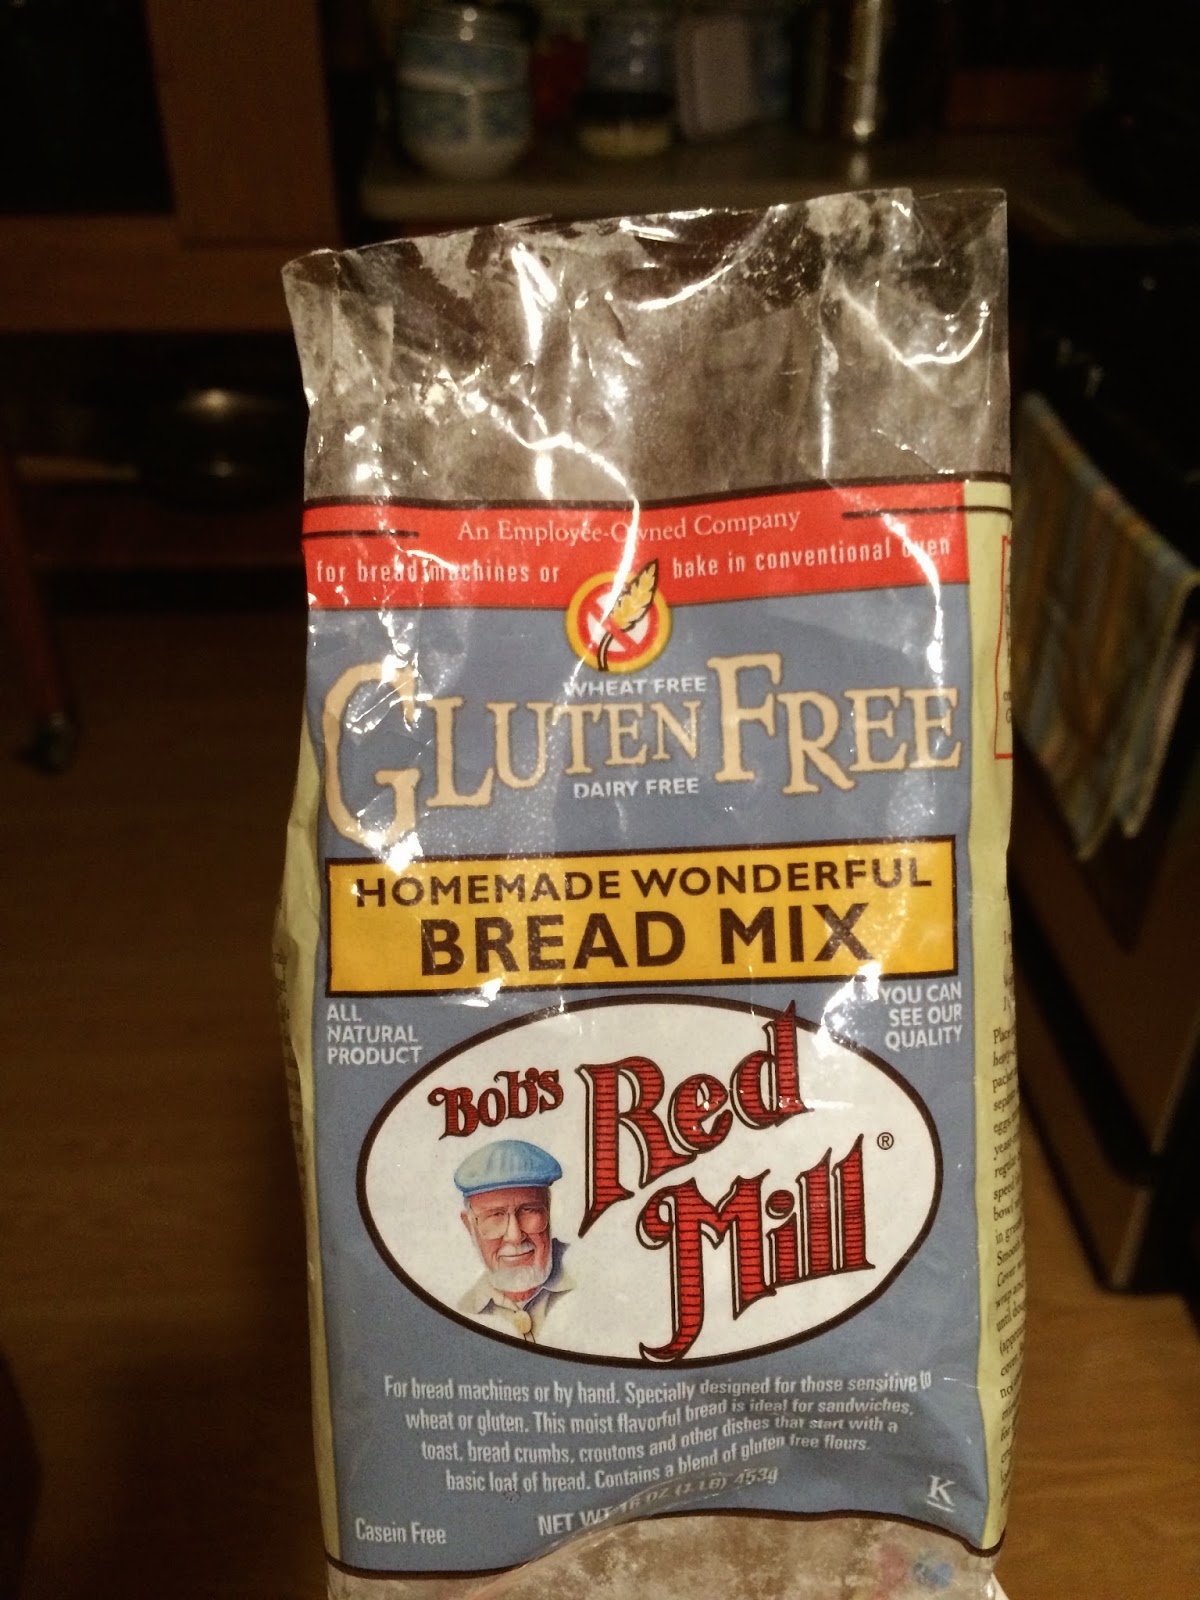
First off, I used a flour mixture from Bob's Red Mill, called Homemade Wonderful Bread Mix.  I have to agree with the name, as it was wonderful!  I can safely say I will be buying more of this flour mixture, as it's a winner!
Now, for what I added to the mix:
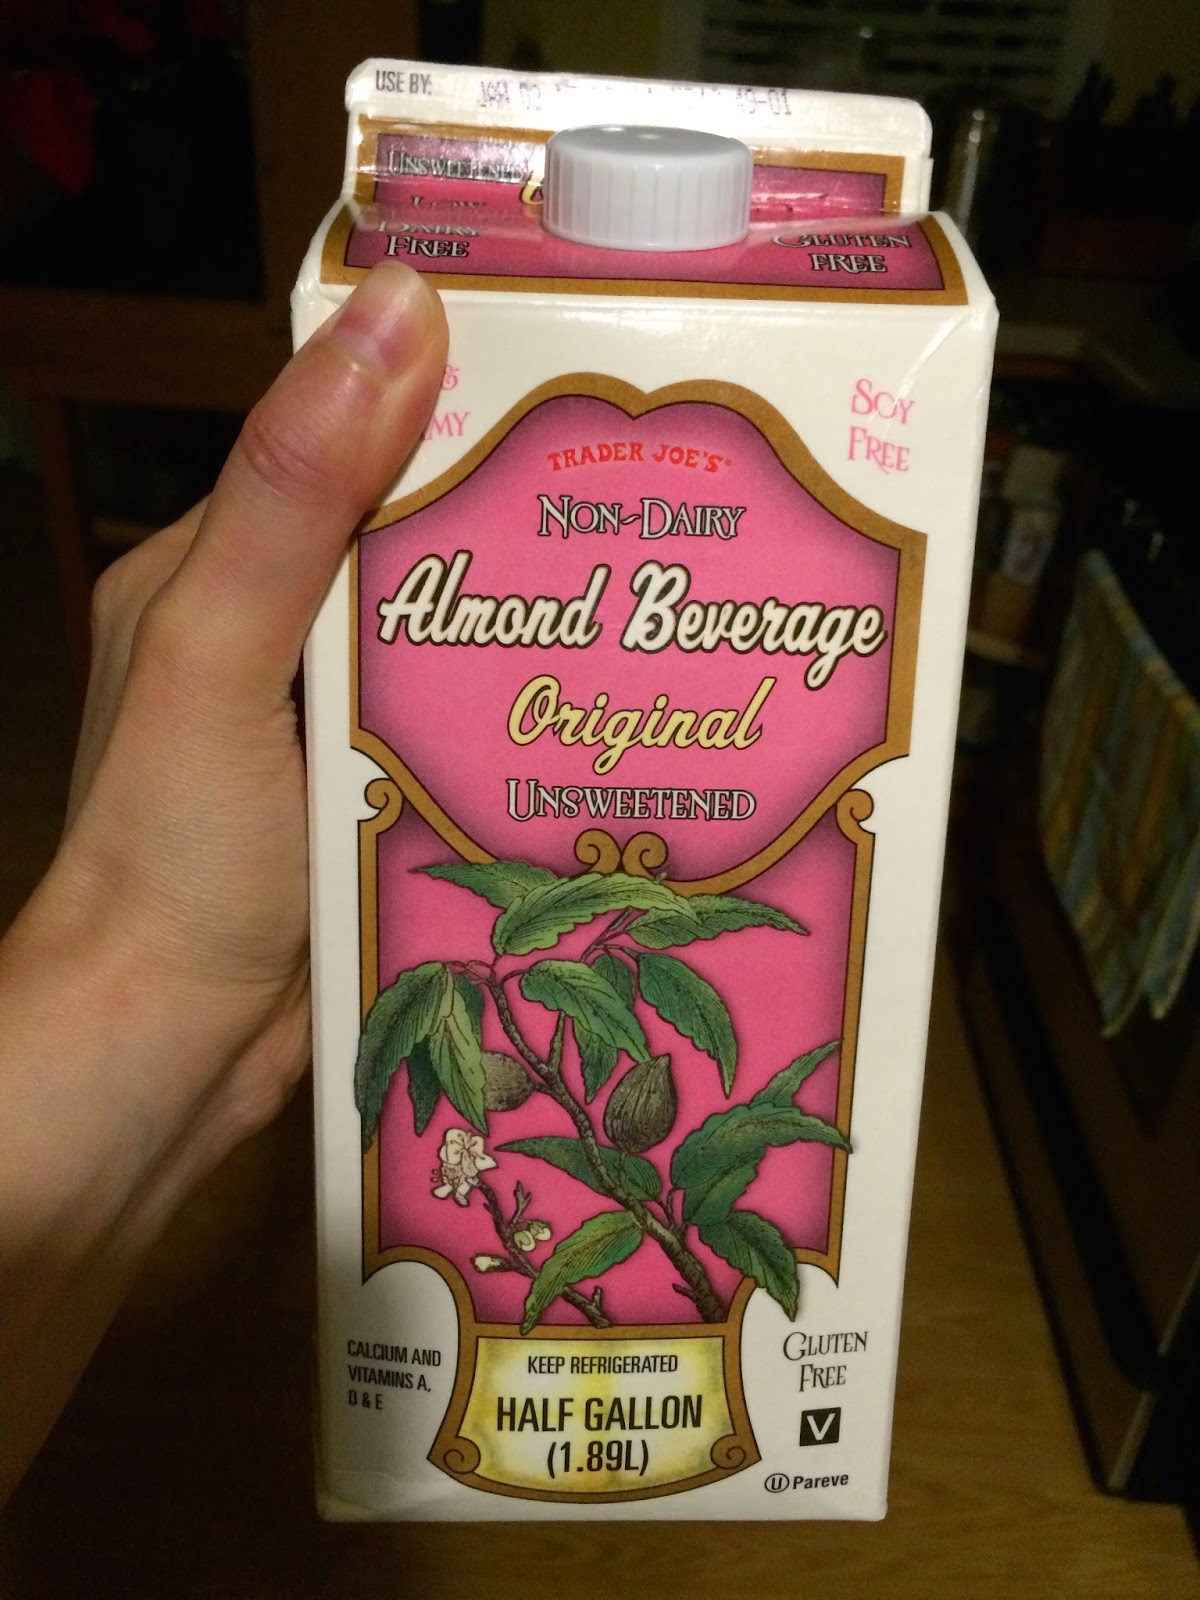
  • 1 2/3 cups of warm (110 degree) Trader Joe's unsweetened Almond Beverage (aka Almond Milk!)
    • I like Trader Joe's Almond Beverage (found in the refrigerated section), as it doesn't have any carrageenan in it, which can cause digestive problems, and I have enough of those!
  • 1 whole large organic egg, plus Just Whites to make enough egg mixture to equal 3/4 cup (2 Tablespoons plus 2 teaspoons Just Whites and 6 Tablespoons warm water)
    • I started buying Just Whites, as it doesn't have any preservatives or other scary ingredients like liquid egg whites, and I got sick of throwing away egg yolks in recipes that need extra whites
  • 1/4 cup (4 Tablespoons) melted organic cultured, unsalted butter
  • 1 teaspoon Bragg's Organic Apple Cider Vinegar
    • This is the best vinegar.  It's unpasteurized and is the real deal!

First, I warmed up the almond milk to 110 degrees and then added the yeast packet and let sit for five minutes, while I got everything else together.  In a small bowl, I mixed together the warm water and Just Whites with a small whisk until it was all dissolved.  Next, I melted the butter.  After the yeast sat for five minutes, I added the flour mixture, yeast/milk mixture, one beaten egg, egg whites, melted butter and cider vinegar to the bowl of my Kitchen Aid mixture.  I mixed it for three minutes on a medium speed, stopping twice to scrape the sides with a rubber scraper.

I oiled up my USA Pans loaf pan (love these pans, if you haven't tried them yet) with cooking spray and added in the dough mixture.  I sprayed a piece of foil with oil and then put the loaf pan in my dehydrator at 80 degrees for half an hour.  This is an extra and unusual step, but it helps keep the dough nice and warm and helped it to rise considerably over the top of the pan.

I put the pan in a 375 oven uncovered for the first 10 minutes.  After 10 minutes, I used the same oiled piece of foil I used in the dehydrator to cover it in the oven and baked for 50 more minutes.

When I took it out of the over after an hour of total time, the crust had turned a golden brown and was nice and crusty when I tapped it with my finger.  As you can see, it looked great when I took it out of the oven.  Nice and puffy loaf with a crusty outside.

After waiting a very long 20 minutes to let it cool on a wire rack, the bread sliced up like a dream!

This is the best gluten-free bread I've had in a LONG time.  My husband agreed that it was excellent, and I will no longer fear making GF bread with this Bob's Red Mill mix in my pantry!

Monday, January 6, 2014

Hot Split Pea Soup for a Cold Night

It's going to be another cold one tomorrow, -15% here with the wind chill. That's a bit crazy!  I'm ready for spring, but it's only January!  With weather like this, I love a hot and hearty soup. One of my favorites is split pea. Here's a vegan version I started making a few years ago.

2 1/4 cups dried split peas
2 quarts cold water 
2 onions, thinly sliced 
1/2 teaspoon Himalayan salt 
1/4 teaspoon ground black pepper 
1 teaspoon dried marjoram 
3 stalks celery, chopped 
3 carrots, chopped 
1 peeled potato, diced

In a large stock pot, cover peas with 2 quarts cold water and soak overnight. If you need a faster method, simmer the peas gently for 2 minutes, and then soak for l hour.

Once peas are soaked, add onion, salt, pepper and marjoram. Cover, bring to boil and then simmer for 1 1/2 hours, stirring occasionally.

Add celery, carrots and potatoes. Cook slowly, uncovered for 30 to 40 minutes, or until vegetables are tender.

Use an immersion blender to puree soup to your desired consistency.

Sunday, January 5, 2014

Quick and Healthy Minestrone Soup

Soup is probably one of my favorite foods.  It's delicious, there are endless possibilities and it warms you up on a cold day.  I especially like this particular recipe.  It's a beautiful soup, filled will all sorts of vegetables.  I like to make it a day ahead, as it always tastes best the next day.

Quick and Healthy Minestrone

1 tablespoon olive oil
2 cups chopped carrots
1 cup chopped onion
1 cup chopped celery
3 cloves garlic, chopped
1 28-ounce can crushed tomatoes, undrained
4 cups low-sodium vegetable broth
1 teaspoon dried oregano
1 teaspoon dried thyme
2 cups packed, sliced fresh spinach or 1 box frozen spinach
1 15-ounce can small navy beans, rinsed
2/3 cups cooked brown rice
Salt and pepper to taste


Heat olive oil in a large, heavy saucepan over medium heat. Add the carrots, onion, and celery ; sauté 10 minutes, until vegetables are tender-crisp, adding in the garlic the last minute.

Stir in the tomatoes, broth, and herbs, and bring to a boil.

Cover, reduce heat and simmer for 20 minutes, until carrots are tender. Add spinach, cover and simmer for 5 more minutes.

Stir in the beans and rice, simmer for one minute, or until hot. Add salt and pepper to taste. Serves 6-8.

Maple Heaven - Maple-Pecan Pie!

As a native Vermonter, I love maple!  How could you not?!  I found a recipe for maple-walnut pie in an almanac one day, and I decided to try making it as a maple-pecan pie instead.  Lee loved it so much, that he requests I make it for his birthday every year.  It's definitely a favorite around the holidays the last few years.  Of course, this recipe is also modified to be gluten-free.

Maple-Pecan Pie

3 eggs
¾ cup brown sugar
2 tablespoons Gluten-Free All Purpose Baking Flour
1 ¼ cup pure maple syrup
¼ cup (1/2 stick) butter or margarine, melted
1 cup chopped pecans
1 unbaked 9-inch pie crust (see below for recipe for gluten-free crust)

Preheat oven to 375 degrees.

In a mixing bowl, beat together the eggs, brown sugar, flour, maple syrup and butter or margarine. Stir in the nuts and pour into the pie shell.

Bake 45-50 minutes, or until a tester inserted into the center of the pie comes out clean. Serve warm or completely cooled. Serves 6-8.


Gluten-Free Pie Crust 

1-1/2 cups Gluten-Free All Purpose Baking Flour (Bob’s Red Mill)
1/2 teaspoon salt
1/2 cup margarine or butter (one stick)
4 tablespoon cold milk (I use almond milk)

Combine flour and salt, then cut in butter or margarine using a pastry blender until mixture resembles coarse meal. Sprinkle milk, one tablespoon at a time, while blending, until all ingredients are moist.

Using wax paper, place dough onto one sheet, flatten with palm, place another sheet on top and roll out to desired size. Remove the top sheet and invert into pie pan.

Dreaming of Artichoke Pie

I started making this recipe about 10 years ago. It has become a hit, and I make it a few times a year for parties, especially around the holidays. About 7-8 years ago, one of our friends tried this pie for the first time. He loved it so much, he actually had dreams about eating this pie! I have a feeling you might like it a lot, too!

Artichoke Pie

1 tablespoon olive oil
1 clove garlic, minced
2 6-ounce cans artichoke hearts, drained
1/2 cup Italian seasoned bread crumbs (I make my own gluten-free bread crumbs from Udi’s bread, or you can also purchase gluten-free bread crumbs)
1/2 cup grated Parmesan cheese, divided
1 9-inch unbaked pie crust (see below for recipe for gluten-free crust)
3 eggs, beaten
1 8-ounce package mozzarella cheese, shredded

Preheat oven to 350 degrees.

Heat oil in a large skillet over medium heat. Sauté garlic until it starts to brown. Stir in the artichoke hearts and cook 10 minutes before adding the bread crumbs and half of the Parmesan cheese. When heated through, transfer half of artichoke mixture to piecrust. Pour eggs over artichoke mixture and sprinkle in the rest of the Parmesan cheese. Spoon the rest of the artichoke mixture into the pie and top with mozzarella cheese.

Bake in preheated oven for 45 minutes, or until crust begins to brown. Serves 6-8.


Gluten-Free Pie Crust

1-1/2 cups Gluten-Free All Purpose Baking Flour (Bob’s Red Mill)
1/2 teaspoon salt
1/2 cup margarine or butter (one stick)
4 tablespoon cold milk (I use almond milk)

Combine flour and salt, then cut in butter or margarine using a pastry blender until mixture resembles coarse meal. Sprinkle milk, one tablespoon at a time, while blending, until all ingredients are moist.

Using wax paper, place dough onto one sheet, flatten with palm, place another sheet on top and roll out to desired size. Remove the top sheet and invert into pie pan.

Sunday, November 24, 2013

Gluten-Free Party Mix

When it's holiday time, it's time for Party Mix.  It just wouldn't be right if I had a gathering and there was no Party Mix for guests (or myself!) to enjoy.  When I first found out I was gluten intolerant, I was really upset about not being able to have one of my favorite holiday treats.  Then I figured out a way to make it, with a few slight modifications.  Any of you who have been to any of my parties know I make a great Party Mix.  It's a fan favorite, and a frequently requested recipe, but I've never written it down before.  The recipe only existed in my head.  Here you go!

You'll need to preheat your oven to 250.  While it's preheating, get two 9x13 baking pans and put 3 tablespoons of butter (or butter substitute) into each pan and place them into the oven to melt the butter.

Once the butter is melted, remove the pans from the oven with an oven mitt and add the following to each pan:

  • 2 tablespoons of Worcestershire sauce
  • 2 teaspoons of lemon juice
  • 1/2 teaspoon of garlic powder
  • 1/4 teaspoon of onion powder

Mix everything together well in the pan, so it's all combined and evenly spread out in the pan.

Next add the following to each pan:

  • 3 cups of of rice Chex
  • 2 cups of gluten-free pretzel sticks
  • 1 cup of mixed nuts (sometimes I add an extra cup of nuts to each pan, if I have enough)

Again, mix everything together very well in each pan, making sure to coat all of the ingredients well with the seasoning.

Once combined, put into the oven for 15 minutes.  Stir each pan and repeat three more times for 15 minute increments of baking and then stirring, for a total time in the oven of 1 hour.  When done, lay out paper towels on the counter and spread the hot mixture on the towels to cool.  When done, store in an airtight container.  I find it always tastes best if I make the Party Mix at least a day or two before eating, so the flavors really have time to develop.

Enjoy and happy holidays!